How to: Paw Print Ornament
With the new addition to our home (kitten Gregory) I got a bug in my bonnet to commemorate our little citizens with their very own ornaments, but how?
Then a memory from long since past hit me: handprints! But in this case: paw prints!
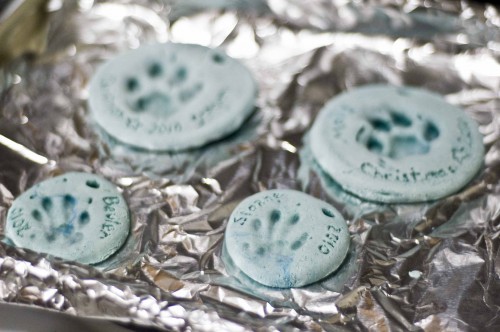
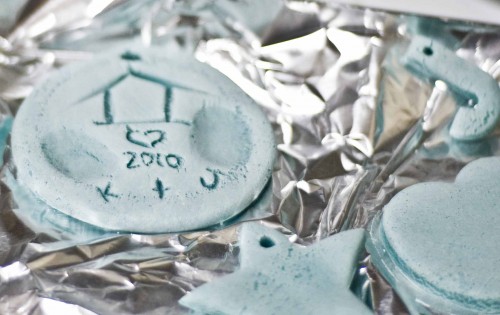
Each little critter gets their own disk. And then I decided that Jason and I get one too. To load up on the cheese, it’s Jason and I’s first Christmas in our house and it seems like something to make note of too.
Paw Print Ornament
materials
- 1 – bakeable play dough, cherry tomato sized ball – see recipe below
- 1 – ribbon or silk cord or yarn, cut 6″ length
- 1 – kitten, dog, baby, ferret, kid, or boyfriend
tools
- plexiglass rod for rolling out the clay
- aluminum foil
- table knife or craft knife
- drinking straw or chop stick
- tooth pick
- oven or toaster oven – preheat to 250 degrees
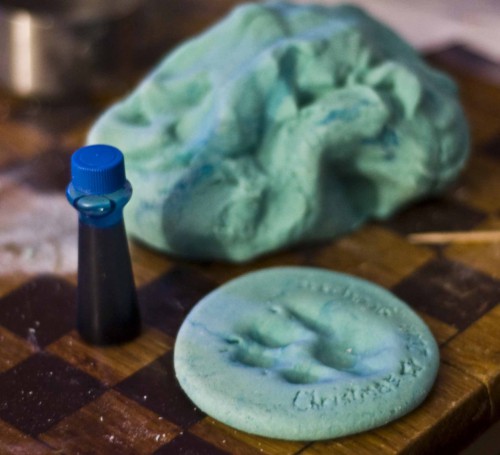
Step 1: Make the play dough and get it just the right shade of your favorite color – in my case, a nice minty teal green.
Step 2: Roll out the dough into a disk shape on the aluminum foil so it’s about 1/4″ thick.
Step 3: Grab a willing (or not so willing) pet, kiddo, or significant other and gently press their paw/hand into the softened clay. (This is why it’s so important to really work it with your hands until it’s nice and soft.)
Step 4: Use the straw (preferably) or chop stick (if that’s all you have) to make a hole near the top of the disk above the print.
Step 5: Use the tooth pick to gently scratch the names of the prints and the date on the front of the disk.
Step 6 (optional): Use the table knife to clean up the edges and make your disk a circle.
Step 7: Slip the pressed dough (on the aluminum) onto a cookie sheet and bake for 7-10 minutes – the dough will start to lighten up – if it turns golden brown it’s been in too long. Let cool completely before stringing up with silk cord or ribbon and hanging on the tree.
More Options: You can decorate these little guys with glitter, paint, stains, and/or paper. Punch out shapes with the leftover dough and make ornaments with those too. Have even more dough leftover? Add a Tablespoon of vegetable oil to keep it moist and store it in a air tight container to play with later.
Bakeable Play Dough Recipe
Ingredients
- 2 cups cheap-o flour
- 1/2 cup salt
- 1 cup water
- 15-20 drops food dye (or more if you want a vibrant color)
Directions
- Mix the flour and salt together until well combined.
- With your hands, mix in a little of the water at a time until the dough becomes all the way moist, but not sticky.
- Add a few drops of food dye and knead until the color becomes consistent. Keep adding food dye and kneading until you get the color you want.
- If the dough starts to dry out, add a little splash of water.
- If the dough gets to wet (like if you add say “wave” of water instead of a “splash”, dust the dough with more flour and knead.
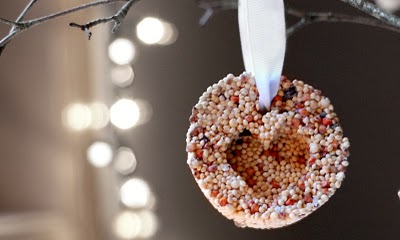
Here are some other ornament tutorials I really loved. I really want to make the bird seed ornaments that Craftzine posted about. How cute! I love my little outdoor friends. Now how can I get the birds to walk on my clay ornaments because wouldn’t that be cute? (Just kidding about trying it though because clay + little bird feet sounds like a tragedy.)
On the CraftyPod
On Craftzine
- Bird Seed Ornaments on Saltwater Kids
- Cones of Joy on Nini Makes
On CraftGossip
- 12 Days of Christmas Ornaments on Stampington
- Whimsical Felt Animal Ornaments on InCircle Interiors
- Holiday Hints Ornaments for the Last Minute Making by Betz White
- Felt Wreath on the Magic Onion
On Whipup.net
Happy Crafting and Happy Holidays!
Kristin Roach

Oh these are SO cute! Maybe I’ll try that with our cats. They already have their own Christmas stockings I made at the weekend, so why not go the whole “crazy cat woman” hog!
hello I really like them! I want to make some for our three cats but what temperature oven?
Hi Alice, I realize now I put the temp in a odd spot, under tools, what was I thinking of? Ha. Anyway, set your oven at 250 degrees F.
Oh, cuteness! And I just happen to have a dog, 2 cats and a ferret handy! Those little ferret prints are so sweet!
I really lucked out that I was able to grab them both while they were asleep so they were back in their cage before they knew what was going on. Full awake they are little squirmers :)
I did the project and posted about it! Love it.
https://thedabblingcrafter.blogspot.com/2011/01/diy-little-footprints-little-handprints.html
Method is simple and easy that Sagrb Thank you
We loved your blog post and project idea so much that we decided to try it out! Feel free to check our video out! https://youtu.be/uoS_D1NoMgM