Vintage Fix Up: A baby buggy into a bassinet!
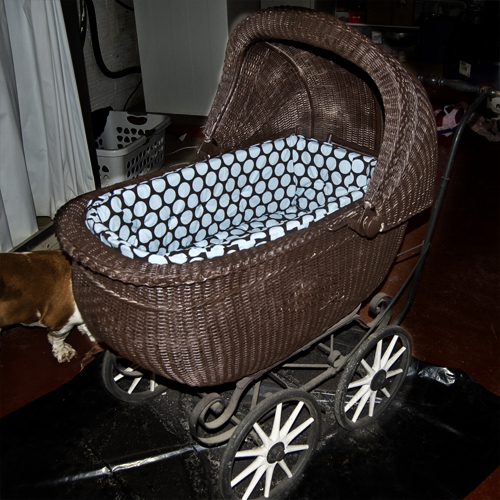
Friends of ours had the surprise of their life about 8 months ago, a baby on the way! How exciting! While looking into what will be the best bassinet for their new baby, they came across a vintage wicker baby carriage. With the help of some glue and spray paint it looks like new!
Now here is where I came in, making a lining for it. It needs to be padded and child-proof and head-pinch proof. Not to mention issues with foam and SIDS to take into consideration.
After much deliberation we decided to make what is essentially a pee pad to fit the bottom out of a water proof liner and a craft foam pad (1 inch thick) and then to buy the baby safe batting (2″ thick) for the sides and the bottom of the fabric liner. The carriage itself has a lot some metal brackets that need to be worked around, so I decided to go with a drawstring vs. elastic for to secure it around the lip of the basket.
With the help of this ruler I was able to measure and draft a pretty decent pattern that fits just right into the basket of the carriage.
First we sewed the side panels, then sewed those to the bottom. Then we fitted the foam and sewed that into place. Then did a little bit of tack quilting (so not the tech term for this) to make sure the batting doesn’t shift around. Then the sides. Then the pieces for the drawstrings. But then that didn’t work, so we just tucked them in and it looked great.

And voila! Check it out. I’m pretty happy that my crafty skills were able to help my friend create the perfect vintage nest for her baby to be. :) Just in time too because she’s due at the end of this week!


Really cute! I love the fabric you chose. It really blends modern and vintage which is my favorite combo! ;)