Make Your Own Drawing Charcoal
Let’s face it, art supplies are expensive. And at first look, sure
charcoal seems to be on the low end of things – but I blow through a
stick and a half for each drawing I do, sometimes more and sometimes
less. Today I was digging around on how to make your own art supplies
and found
this great article on how to make it via this
About.com article. It’s written by Evan Lindquist whose an art
professor over at Arkansas State University.
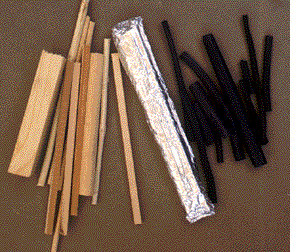
It says to wrap your wood in heavy duty aluminum foil and find a grill
(abbreviated version of course) and it just so happens I’m grilling
out tonight! I’m going to try it tonight and I’ll let you know how it
goes along with some pictures tomorrow.
See you then!
Kristin


Tightly tie dry sticks together, place in a 2″ x 6″or 8″ galvanized nipple, available at a plumbing supply house or Home Depot/Lowe’s, loosely screw caps onto both ends and place in a hot oven – the longer you bake it, the softer the charcoal will be – two to three hours at 400+ degrees should do it – let cool before opening . One can make vine, willow, or very wide charcoal sticks according to preference using various woods – willow (literally), oak(s), birch, beech, but stay away from oily or high resin woods like pine or hardwoods: walnut, rosewood, teak – they give off volatile gases, hence the reason for a loose cap. A grill that’s working to cook food isn’t consistently hot long enough for softer charcoal. One can also use hairspray as a fixative but using a mouth sprayer (two hollow shafts at right angles) and liquid fixative is more environmentally positive and safer, unless one inhales when one should exhale). Mix white (clear) shellac and ISO alcohol for the liquid form; mouth sprayers are found at art supply stores only.