Midweek Get Over Hump Day with Cooking Crafts – Aprons! – Part II
Okay, so this is going to turn into a three part post, which is okay with me if it is with you. I’ve decided to explain what I’m doing a little more than I usually do in a midweek post just because I love reconstructing vintage patterns. Aprons are usually pretty easy to do to as you will see. The thing is that this one has a lot of bias tape in in… that I’m going to make. And even though I have my handy dandy bias tape maker, it’s still going to take some time, so i’m going to show how I “made” the pattern today, and tomorrow I will show it being sewn together as well as some “in action” photos (me cooking in it).
I think I’m going to end up making another one as well because I just had to fore fit my home studio apron to my ceramics class. So the timing works out really well. I don’t want to be short an apron at home! Heck no.
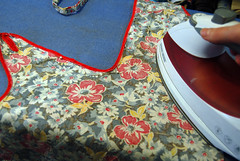
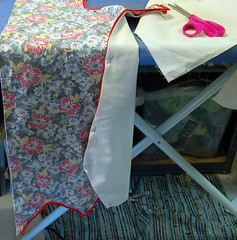
So the first step is to iron everything. Iron the apron, iron all your fabric. Everything!
Now this only works for aprons made on a fold, which I suppose is most, but still, if its pieced, or has pleats or darts or anything like that, this has to be done differently. If your apron is made on a fold, you are a-okay. Anyway, I folded the apron in half lengthwise and, starting at the bottom, pinned all the edges together. Then I pressed a nice strong crease for the the fold line. I didn’t worry about the straps because those are separate pieces.
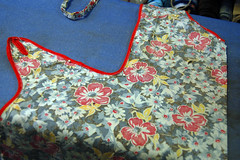
Measure the length of the apron from top to bottom, cut the main colored fabric a little longer just in case. Then, pin the fold of the main colored fabric to the fold of the apron that was just pressed.
Working your way around the edge, smooth and pin the apron to the fabric. If you want to keep a paper pattern, use paper instead of the fabric.
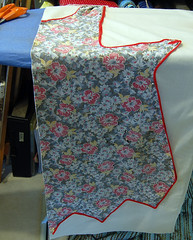
Cut out your fabric, be careful not to knick the apron with the scissors. If it is really old and precious, out line the apron with chalk, soap, or sewing pen, unpin the apron, then cut out.
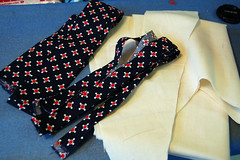
For the straps I just pinned them to a double thick layer of fabric and cut them out. The ties are about 1″ wide, so I’m going to use my bias tape maker to make them. Measure the length and cut out enough fabric for the front and back of the strap (i’m using contrasting colors).
For the bias tape trim, I used a sewing measuring tape to measure all around the edge of the apron as well as the neck line, then divided it by the length of my fabric (190″/36″) and rounded up. It ended up being 18′.
And that is where I stopped for today. I’m going to finish making my bias tape tonight and, if time allows, finish up the apron. I’ll post it all tomorrow. HA! See here is where the being realistic thing comes in. Did I completely forget that I need to put the finishing touches on the pattern tonight that’s going up tomorrow! I think I did. That’s okay. It’s just about finished and I will be posting a super cute, just in time to make for Valentine’s day plushy, tomorrow.
I will continue the apron remake next week because… dun dun da da! The February Craft Leftovers Monthly will be going on sale Sunday morning! (so I need to work on that instead of the apron) Hooray! (I’m leaving out of town sunday afternoon, so it’s going up a little early this month). I’ll give you all the juicy details tomorrow when I post the pattern as well as send an email to everyone on the mailing list.
Have a happy friday night!
Until then!
++Kristin Roach++=