
How to :: Saving my Knitting :: Part I :: Life Lines
I’m not sure why I never thought about writing about this before, but today as I was ripping back 8+ rows for the 1 millionth time I did. I worked at a yarn shop for almost 2 years (just ending this past May when I moved to Ames) and helped people save their knitting projects over and over again. I want to share that with you, give you a little how to on saving your knit project. Learning these simple techniques will save you hours of frustration. Today I’ll start with life lines because that’s the issue I’m facing right now, but then I’ll go back a bit to the basics and show you things like how to pick up dropped stitches and untwisting twisted stitches and things like that.
So what is a life line? Life lines are a length of contrasting colored yarn or string that you thread through a row in your knitting in case you need to rip back. They are really useful when facing any kind of complex knit project: lace, cables, complex shaping, etc or when you are working with fine/hard to pick up/fussy yarns. They are called life lines because if you completely mess up your count/stitches/drop something, you can just rip back to your life line and easily pick up the stitches on it.
Life lines can come before (if you are smart about it) or after (if you are like me) you will be needing them. I remember to use them every 10 rows or less in lace, but other knitting projects, like a scarf I’m working on right now, I don’t think to… and then I regret it.
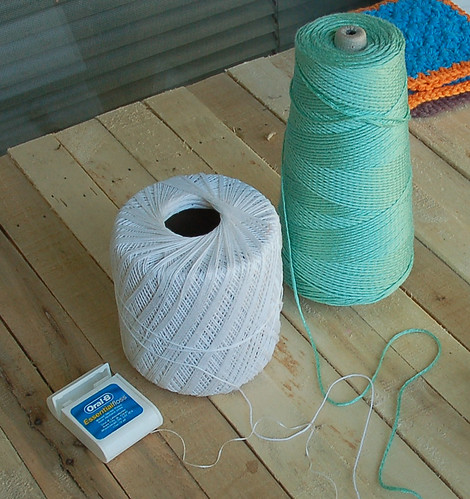
What makes a good life line: cotton crochet thread, fingering weight rayon, waxed linen thread, waxed unflavored dental floss. Over and over again I have heard expert lace knitters swear by dental floss. It’s thin, it won’t break, and it doesn’t shed or grab your yarn. Perfect. I’ll be using the cotton, but that’s because it’s a little easier to see. Normally I would go for the floss too.
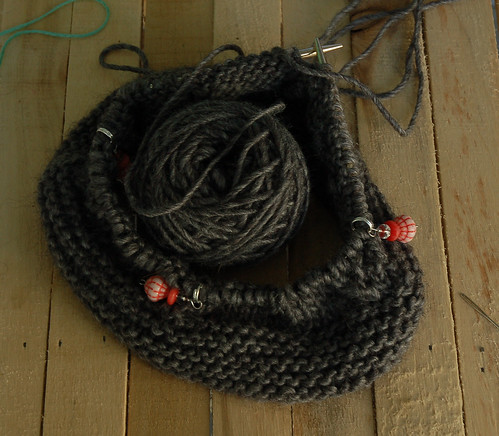
Where should you put a life line: The last row of a pattern repeat works best, that way you always know what row comes back in case you need to rip back to it. After you finish a section of complex knitting, like right when you are starting in to the section of 10 inches of stockinette stitch is also a good spot. In my case for the project I’m working on, right after the easy part and before the hard part starts. Why is that? The pattern isn’t too clear, so I have to try about 4 or 5 different ways of doing the same thing to get it to work out, and every time I don’t get it right, rrrrrrip. I don’t need to go all the way back to the beginning though, so a life line at this point would just make things easier to get going again on the next try.
Putting in a preemptive life line:
1. Measure a length of contrasting colored thread so it is at least twice as long as your knitting is wide (or the circumference if working in the round).
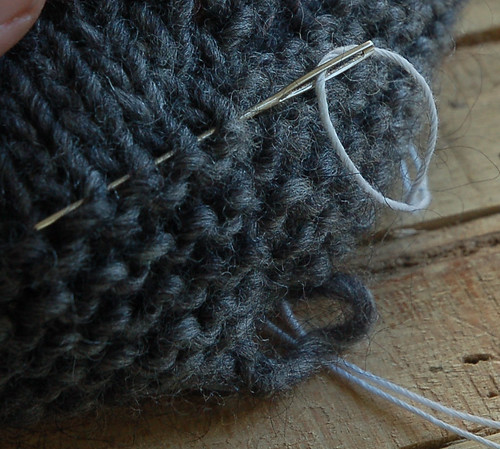
2. Thread a yarn needle with the thread.
3. Thread the life line through every stitch on your needles working purlwise (keeps your stitches from being twisted when you rip back).
4. Tie the two ends of the life line together in a slip knot.
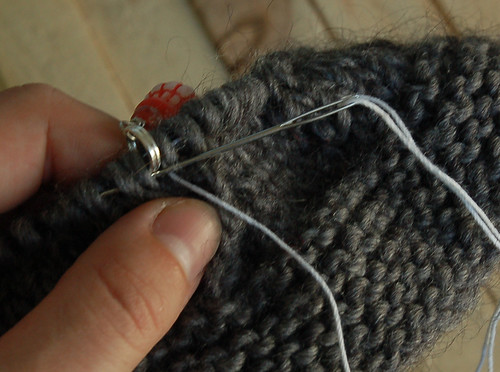
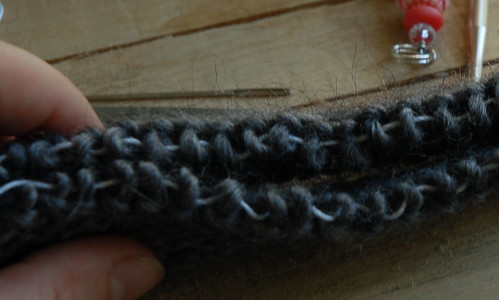
And you are all set. Just keep on knitting, but make sure not to knit the life line. Oh also, don’t thread the life line through stitch markers, that would be a headache and a half. This is what it will look like after the next row is knit:

Putting in a procrastinators life line:
1. Measure a length of contrasting colored thread so it is at least twice as long as your knitting is wide (or the circumference is if in the round).
2. Thread a yarn needle with the thread.
3. Figure out which row you would like rip back to. The best row is an all knit or purl row, it just makes it a million times easier.
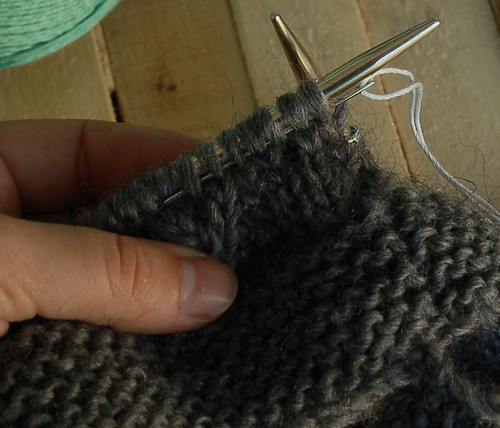
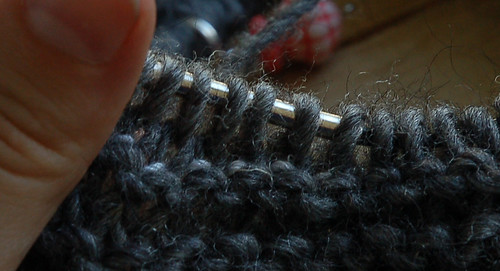
4. Carefully, one stitch at a time, pick up and slip purlwise the right side of each knit stitch.
5. Tie the two ends of the life line together in a slip knot.
6. Take out your needles and rip back to your inserted life line.
7. Slip all stitches from the life line to your needles.

After working a life line like this, you may need to pick up some dropped stitches from possibly picking up stitches from two or three different rows (or rounds). Don’t panic though, it’s an easy fix. After slipping all the stitches, on the next row, work in pattern and pick up, drop, or untwist stitches as needed.
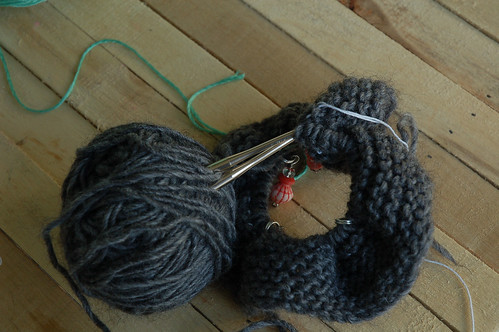
All set:
++++++++++++++++++++
Next time I do a Saving Knitting post, I’ll post about picking up and untwisting and reworking stitches from a row or two above (like if you have a knit stitch you were supposed to purl in the last row).
Make sure to check out the new shop and don’t forget that Craft Leftovers Monthly is only on sale until midnight tonight so take a look at that too.
I’ll see you all tomorrow!
Happy Crafting!
++ Kristin ++
ps – I added a ::How To:: section to the archive sections, which I renamed “Free Patterns & Tutorials”.

Fantastic!! I will try this on my next pattern:)
Fantastic. Wish I knew this 12 hours and 12″ of a complicated shawlette pattern.
Live and learn. And do over. over. over.