Guest Tutorial: How to Prepare Your Pumpkin for Painting
I do a lot of paint related things – stamping, collaging, illustrating, and painting. And really paints shouldn’t be kept more than 6 months to a year. They will start to separate and dry out over time. Every time I buy paint for a project, I’m faced with leftover paint to use up before it dries out – particularly with acrylic and water based craft paints. I was so happy when Mallie from DecoArt paints emailed me about their new set of tutorials on About.com and said I should feel free to share them with you! Last year I painted a pumpkin for the first time and it faded pretty quickly. Thanks to this tutorial, I now know how to clean and prepare my pumpkin for painting and have some new ideas for decorating it! You can get quite a few more ideas on pumpkin painting on their About.com Pumpkin Painting Idea Center too.
Cleaning and preparing your pumpkins
Choose pumpkins that don’t have any blemishes. (They might rot.)
If the pumpkin is a little dirty, wipe off with a baby wipe or damp paper towel. Let it air dry or wipe it dry with paper towels. Either way, it needs to be completely dry. If the pumpkin is muddy, rinse it off with a garden hose. Scrub gently so that you don’t bruise or puncture the skin. Let it dry.
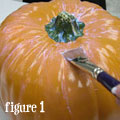 Paint the whole pumpkin with Multi-Purpose Sealer (figure 1). Let dry; usually it takes a couple of hours to dry completely. Another option is to mist pumpkins with a light coat of Americana Matte Spray Sealer and set aside to dry.
General tips for painting your pumpkin
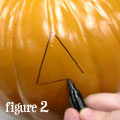 Draw a face, pattern, or freehand design onto your sealed pumpkin with a permanent marker (figure 2).
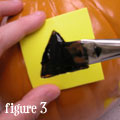 Use pattern templates, foam or adhesive stencils, or foam stamps to paint designs onto your pumpkin (figure 3).
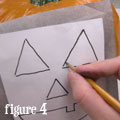 Trace and gently transfer a computer font or clipart printouts or patterns onto your pumpkin using transfer paper and a pencil. Simply apply the graphite side of the transfer paper onto your pumpkin and place the image you want to trace on top. Use a pencil to trace the design and reveal (figure 4).
Use masking tape to create stripes or squares on your pumpkin for perfect lines and shapes.
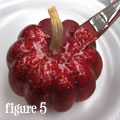 If you plan on using DecoArt Craft Twinkles or Craft Twinkles Writers, make the sparkles pop by applying an undercoat to the area of a similar color before applying the Twinkles (figure 5).
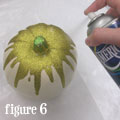 Adults should spray finished pumpkins outside or in a well-ventilated area with Americana Matte Spray Sealer (figure 6). Lay down a piece of newspaper or paper before spraying to catch excess. To make a customized spray booth, cut off the top and one side off a large cardboard box and spray your pumpkin inside. This will prevent overspray and will keep fumes and spray in one place.
Always have wet wipes available to clean your hands or to wipe off any painting mistakes.
Fun ideas to try
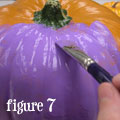 Paint pumpkins solid colors for various characters (figure 7). Try these solid color pumpkin ideas on for size:
Purple – Dracula, monsters, bats
Green – witches, goblins, aliens
White – ghosts, puppies
Black – spiders, bats
Silver – robots, aliens
Brown – bears, owls, fox
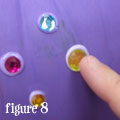 Use a low-temp glue gun to add additional embellishments or accents to your painted pumpkin. Use yarn, raffia, or corn hucks for hair, and Styrofoam balls for eyes. Also try accents such as artificial leaves, chenille stems, pom pons, beads, sequins, scarves, and hats to create a one-of-a-kind pumpkin. You can also embed small objects such as sequins, rhinestones, or buttons using DecoArt’s Foam Paint (figure 8).
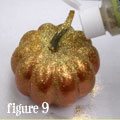 Give a sparkling sheen to your finished pumpkin by sprinkling Glamour Dust on it while paint is wet (figure 9).
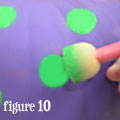 Create a non-traditional looking pumpkin by painting wacky shapes, stripes, and polka dots. Use a pouncer brush to make perfect polka dots (figure 10). Dip the pouncer in paint, dab off excess, and pounce onto surface.
Combine pumpkin carving and painting techniques for a truly original pumpkin design.
Pumpkins don’t always grow perfectly. If a pumpkin will sit better on its side, see if you can use the stem as part of the face. (As a witch’s nose, for example.) Study the shape. You may come up with a funny monster, puppy dog, alien, or bug.
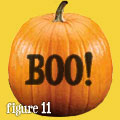 Easily personalize your pumpkin with your name or giant initial for a fun touch. Transfer a computer letter font using transfer paper and pencil onto your pumpkin (figure 11).
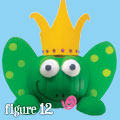 Use Craft Foam to add easy, 3-dimensional effects to your pumpkins like wings, ears, hands, crowns, etc (figure 12).
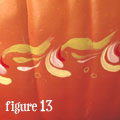 Add decorative painting techniques and strokework to create elegant and stylish scrollwork pumpkins (figure 13).
