
How To :: Potato Stamping
I love printing, just about any kind really. From the copy machine to silk screening to block prints and monoprints. I love it all. And one of my favorites, that’s the easiest, quickest, really fun and super easy to clean up is potato printing.
You can print about on anything with them and they are cheap and the supply list is short unlike silk screening or even block printing really. Granted, you can’t get realllly detailed, but it’s great for greeting cards, pots of plants, even fabric really.
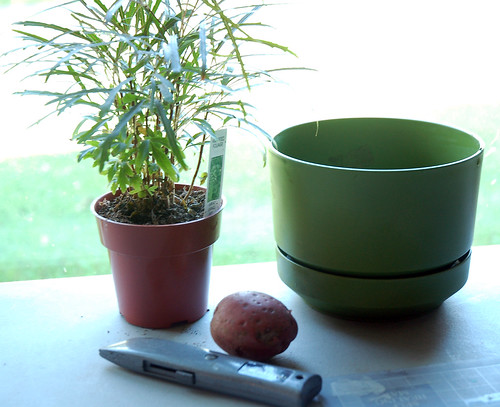
Here is all you need:
1 potato
1 X-acto, utility, or sharp kitchen knife
Acrylic craft paint
Paper
Stiff bristle brush and maybe a smaller brush for filling things in
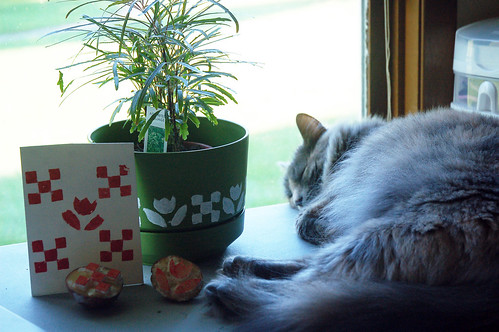
Today I just happened to be re-potting my little plant and wanted to add a little something to it. It just looked pretty standard (read boring). Potato stamps would be just the thing, especially because I wanted to do a kind of folky design on it.
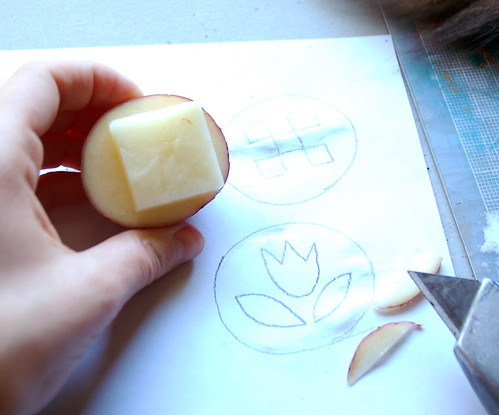
Cut your potato in half.
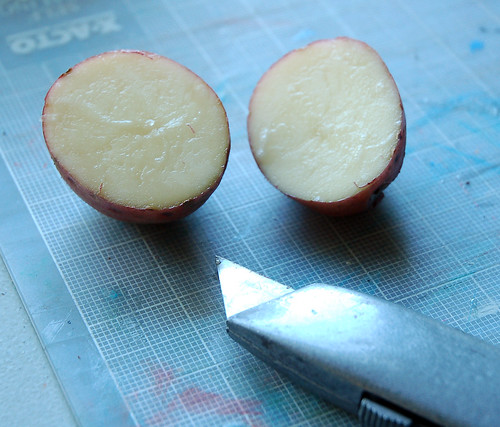
Trace the potato on a piece of paper to get the size right for your design.
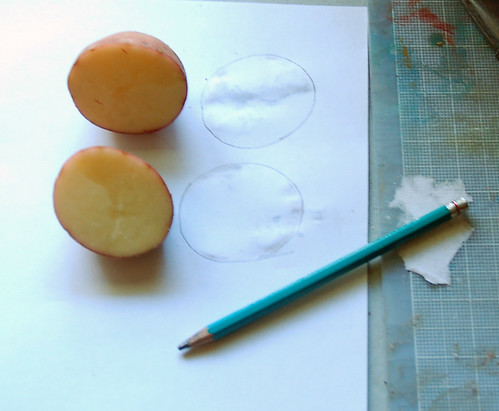
Draw or trance your design into the potato template.

Now there are two ways you can do this. If you have a more complex shape or you need it to be really precise, cut out the design, place it on the potato (which is damp so it should stay put), and cut around it. Just cut down 1/8″ and clear out the negative space. Then remove the paper and cut it so it’s about 1/4″ deep. I just eyeballed it because mine were pretty easy.
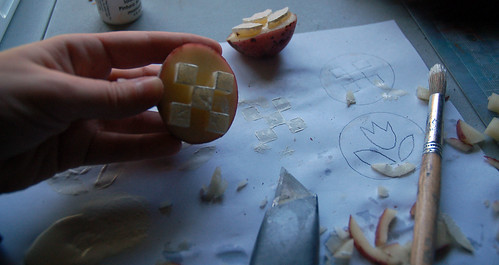
A key thing to keep in mind is the negative space, especially when eyeballing it. Don’t try to cut out the design, cut out the space that’s not part of the design. Like here:
I didn’t try to just cut out the design, I cut out the area around the design which left a square, and then I cut away the smaller squares. Easy peasy.
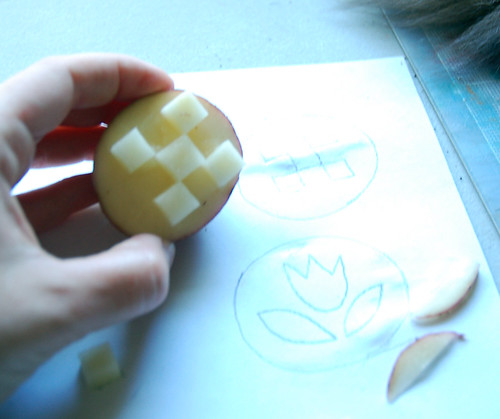
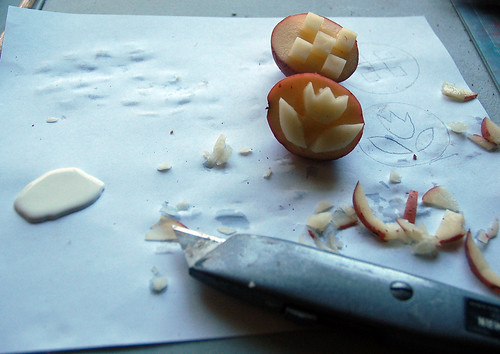
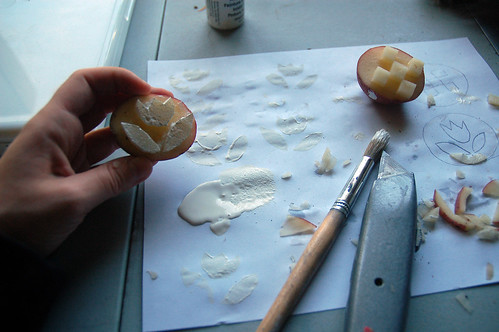
Get a little glob of paint on your paper and use your stiff bristle brush to tap paint onto the stamp. Don’t brush on the paint, tap it on. It gives it a more even coat this way. Test out your stamp a few times and even out the top as needed. I didn’t just cut my potato straight through, I used two cuts, so the flower was a little off. I shaved it down and it was just fine.
The square pattern was good to go the first time around.
I then stamped around my planter first. The potato was pretty wet, so it didn’t quite fill in as much as I would have liked on the plastic, so I touched it up with a smaller brush. Oh and when you are printing on a rounded surface, place the stamp down so the middle is touches first, then rock it to the left and right and then back to the center and then take it off. If you try to put it down on one side and rock to the center and then the other side and then take it off it has a tendency to smear. Or if you place it center first and try to take it off when it’s rocked to the right or left, it smears. How do I know this? Because that’s what I did, haha. I got the last two flowers and squares just right, but the rest are a little skewed. That’s okay. I just touched them up a bit.
If you want to be really precise, measure out where you will be stamping. Like with the pot I really should have marked off every 1 1/2″ around it so that way they would be evenly spaced. It turned out okay, but next time I would measure and mark it just to make sure.
I also made a little post card with these potato stamps too and I really like the way it turned out and I think I’ll make some more before the potatoes go bad, haha. That is one disadvantage to potato stamps, you can only use them for so long before having to pitch them.
I swear I didn’t pose this picture. I was done with the pot and did the post card and Molly (my falling asleep on the job studio assistant) came up and fell asleep right there. She’s such a funny cat like that.
Molly and I are going to make some potato stamp templates and add them to the post tomorrow. That way you can print them out to make your own potato stamps.
Have any of you ever stamped with potatoes before? Do you have any tips or tricks you could share?
See you tomorrow! Happy Crafting!
Kristin

I have to tell you, Kristin, that ever since I started following this blog of yours, I have yet to be disappointed! Thanks for all the creative ideas. I think I might just try this potato printing with my little ones this weekend. We’ll make a little mess and have some fun together.
BTW, I also subscribe to Everyday Food and have found some of my family’s favorite meals in there. You have to hand it to Martha, or her staff…they come up with some real goodies!
Keep up the great work!
MGM
Kristin, I love your potato stamping. I will have to try that. I agree with you about Martha Stewart. I enjoy her ideas & magazines too. I love the picture of your cat with your project, Molly is such a neat cat! I will have to send you some of the pictures I have with my cat Katie with some of my projects. :)
Just wanted to let you know that we did some potato stamping over the weekend and the kids loved it. I cut out a brown paper bag on the folds to make little square cards, enough for each of the kids to do one for each of their school and library friends. Then we stamped a pumpkin on the front of each one. We will use little rubber stamp letters to ‘write’ messages on the inside. I’ll post pics on my site when they are finished. Thanks so much for the idea.
MGM
you take even the ordinary things in life and make them special
that is so sweet! thanks! (learned it from you and dad, hehe)
How long will a potatoe stamp last? What do you do with it when you are done? Do you wash/cut the paint off and cook them?
hi, its very nice…it helps me al ot for my project…this catalina bonus from the philippines.God bless
hi, its very nice…it helps me al ot for my project…this catalina bonus from the philippines.God bless
This project brings back memories of school-aged arts and crafts. What a lovely reminder that simple objects can be transformed into wonderful art mediums. Thanks for sharing — will have to revisit this.
This project brings back memories of school-aged arts and crafts. What a lovely reminder that simple objects can be transformed into wonderful art mediums. Thanks for sharing — will have to revisit this.
This project brings back memories of school-aged arts and crafts. What a lovely reminder that simple objects can be transformed into wonderful art mediums. Thanks for sharing — will have to revisit this.
Wow, great tips! I am about to embark on a team fleece hat project, and need to copy the school logo — I think your tips will really help with this and avoid the very expensive prospect of getting a rubber stamp made. Thank you!