
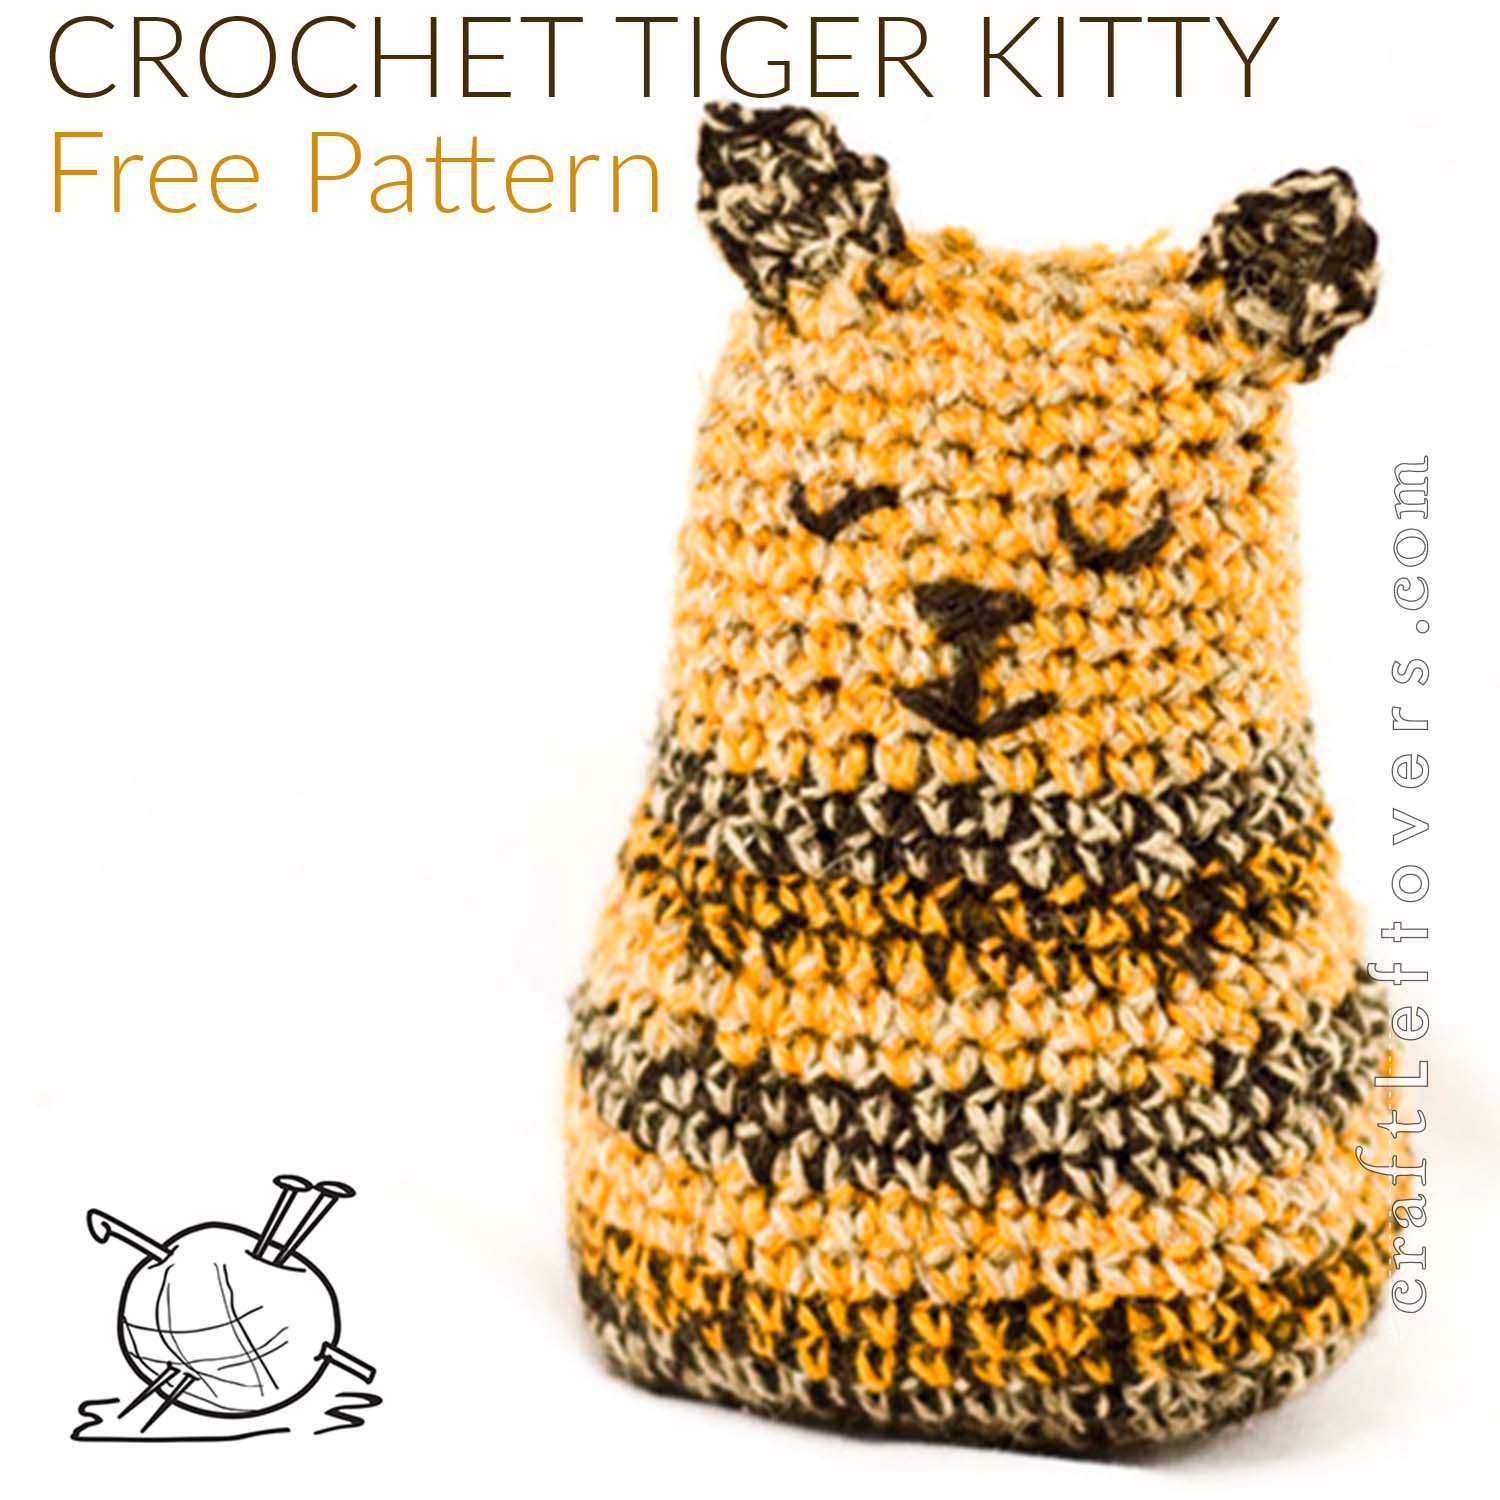
Free Pattern: Crochet Tiger Kitty Plush
First published in the March Volume 2 issue of Craft Leftovers Monthly, this little Tiger Kitty spread its sweetness to Craftzine.com back in 2010. Get it here on the Craft Leftovers blog for the first time. Be careful though, he may be a little sweety when sleepy, but this Tiger kitty is as fierce as any full grown tiger cat out there!
Get the updated Crochet Tiger Kitty pattern as a pdf
Read about the pattern recovery project here
I’ve revised the pattern for clarity and would consider this pattern easy for anyone who makes crochet plushies, but tricky for those not yet used to crocheting in the round.
TIP: Want a bigger one? Just up the hook and yarn size. Just be mindful you’ll need a nice tight stitch with minimal gaps between the yarn or you’ll be able to see the stuffing.
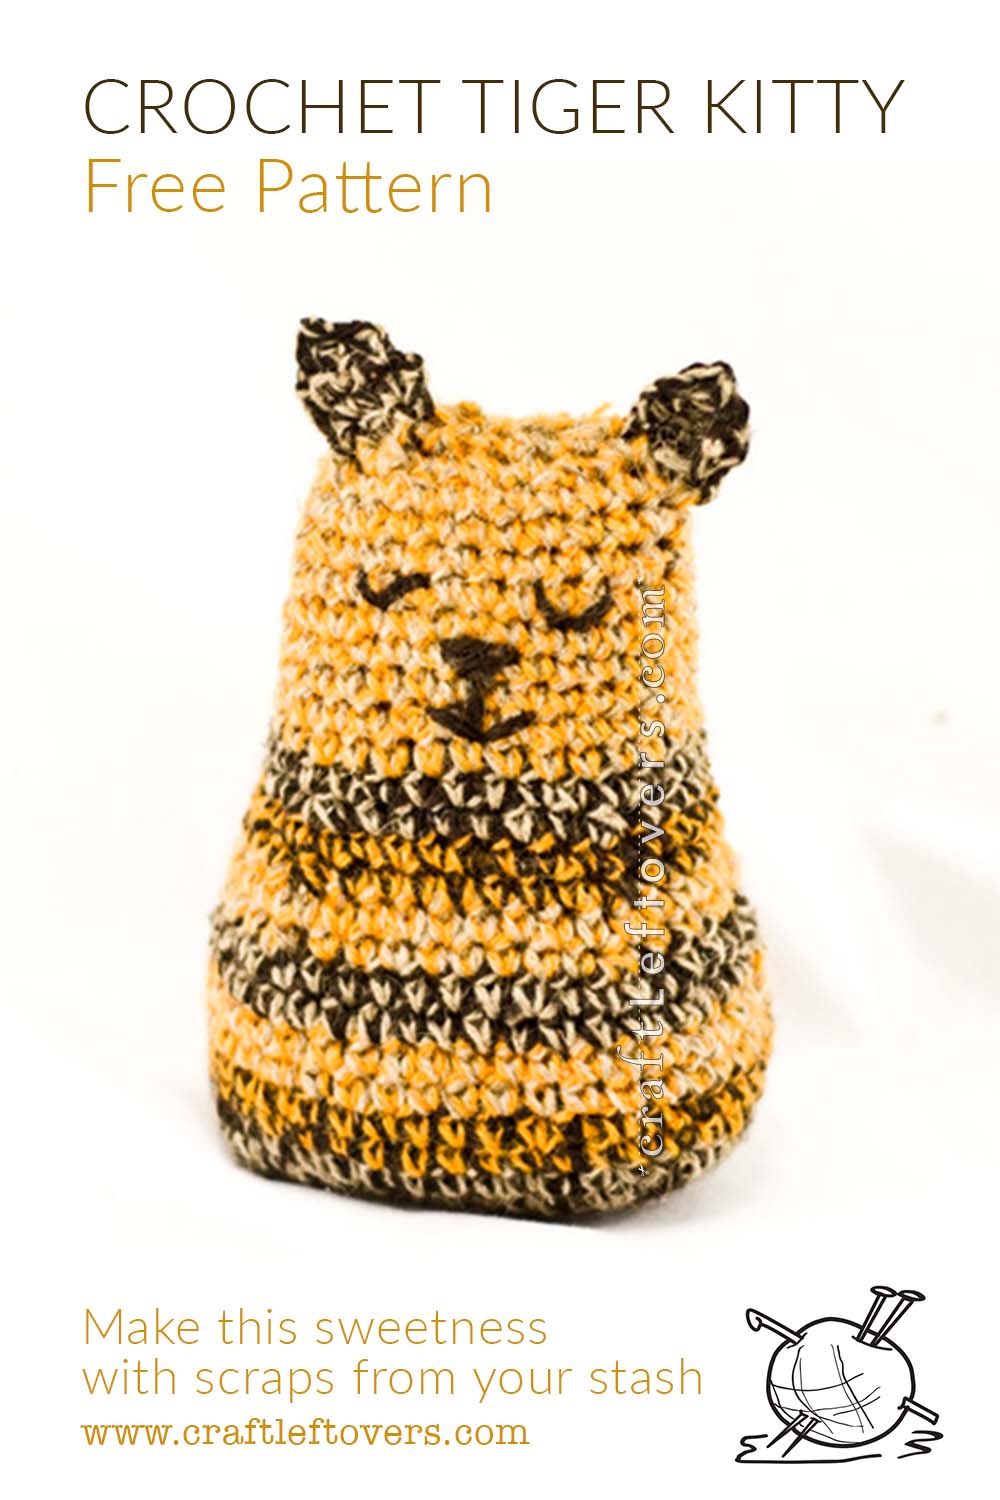
Aww … so sweet when this little tiger kitty is sleeping, you better hope to never meet him awake. Don’t let that sweet sleepy face surprise you; he’s the fiercest little tiger I know.
Materials
- 10g — fingering weight » »yarn, color A
- 10g — fingering weight » »yarn, color B
- 10g — fingering weight » »yarn, color C
Tools
- Crochet hook, size D (3.5mm)
- Yarn needle
Techniques
- working two strands of yarn as one
- picking up crochet stitches
- working in the round
- decreasing & increasing
- straight stitch embroidery
Abbreviations
- SC = single crochet
- CH= chain
- ST(S) = stitch(es)
- SC2TOG = single crochet two together
Gauge
- 4½ sc = 1”
Body
Foundation Row: Holding yarn A & B together, chain 13 sts. Sc into 2nd chain from hook, 1sc in each ch st to end of row, turn.
Row 1: Ch1, 1 sc in ch st; 1sc in each sc to end of row, turn.
Repeat Row 1 four (4) more times — 6 rows completed, including foundation row.
Pick up round: Ch1, work 1sc in each next 6 row ends, work 1sc in each of next 12 sts in foundation row, work 1sc in each of next 6 row ends, work 1sc in each of next 12 sts — 36sc worked.
Place marker at the beginning of round.
Round 1: 1sc in each st to end of round, join to beginning of round with a slip stitch — 36 sts worked.
Round 2: Repeat Round 1.
» Work 2 rounds as Round 1 with color A & C.
» Work 2 rounds as Round 1 with color B & C.
» Work 2 rounds as Round 1 with color A & B.
Decrease Round: Change to color B & C —
» Ch1, 1sc in each of next 4sc sts; sc2tog, 1sc in each of next 10sc sts, sc2tog, 1sc in each of next 6sc sts, sc2tog, 1sc in each of next 10sc, sc2tog, 1sc in each of next 2sc sts, join to beg of round with a slip stitch — 32sts remaining.
» 1sc in each st to end of round, join to beginning of round with a slip stitch — 32 sts worked.
Change to colors A & B:
» Ch1, 1sc in each of the 4sc, sc2tog, 1sc in each of the next 8sc sts, sc2tog, 1sc in each of next 6sc, sc2tog, 1sc in each of next 8sc, sc2tog, 1sc in each of next 2sc, join to beg of round with slip stitch — 28 sts remaining.
» 1sc in each st to end of round, join to beginning of round with a slip stitch — 28 sts worked.
Change to color A & C:
» 1sc in each st to end of round, join to beginning of round with a slip stitch –28 sts worked.
Repeat round 4 times.
» Pack with stuffing at this point, as much as possible.
» Ch1, 1sc in ch st, 1sc in next sc, sc2tog, 1sc in each of next 10sc sts, sc2tog, 1sc in each of next 12 sc sts. — 24 sts remaining
» 1sc in each st to end of round, join to beginning of round with a slip stitch — 24 sts worked.
» Ch1, 1sc in ch st, 1sc in next sc, sc2tog, 1sc in each of next 10sc, sc2tog, 1sc in each of next 12 sc sts — 20 sts remaining.
» 1sc in each st to end of round, join to beginning of round with a slip stitch — 20 sts worked.
» Ch1, sc in base of slip stitch, sc2tog, 1sc in each of next 10 sc sts, sc2tog, 1sc in each stitch to beg of round. — 16 sts remaining
» Ch1, sc in base of sl st, *sc2tog, 1sc in next sc stitch*; repeat * * until 8sc sts remain.
» Cut 3” tail and fasten off. Stitch hole shut using tail yarn. Weave in end.
Ears
Using colors A & B — 1sc in each of 4 sts as shown in diagram for ears, turn.
Row 1: Ch1, 1sc in each of 4 » »sc sts, turn.
Row 2: Ch1, 1sc, sc2tog, 1sc, » »turn.
Row 3: Ch1, 1sc, sc2tog, cut » »yarn and fasten off.
Repeat for the 2nd ear.
Using color A, embroider face as shown in the illustration.
Get the updated Crochet Tiger Kitty pattern as a pdf
Read about the pattern recovery project here
Sign up for the Craft Leftovers mailing list to get a monthly update of new content and re-releases. You can also follow me on Instagram to check out the crafty projects I’m crafting. And of course, if you make something with one of my patterns, just tag it (#craftleftovers). I love seeing what you’ve made with your unique leftovers!

