
Making my own earrings: And how to make your own too!
Recycled Bead Earrings
Quick as a Flash Glitz!
When I moved, I carefully packed up my jewelry box. I wrapped it in tissue paper and tucked it into a safe place. Since then I have been 100% without any jewelry save my engagement ring and one necklace I tend to wear just about every day–no earrings though. I decided it was about time I changed that. Earrings are easy to make, take only a few supplies, and just a few minutes of time.
Materials
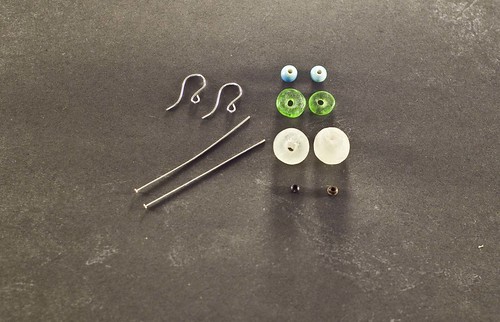
- 2 – Fishhook earring loop
- 2 – 2 inch post
- 2 – 6mm beads (blue ones)
- 2 – 1cm disk bead (recycled glass green ones)
- 2 – 1.25cm round bead (recycled glass whiteish ones)
- 2 – 3mm seed bead (itty bitty wood ones)
Tools
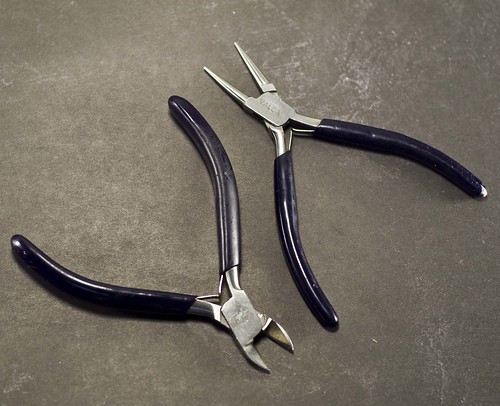
- Round nose pilers
- Wire cutters
- Optional: flat-nose pliers (helpful in wrangling the wire post)
Directions
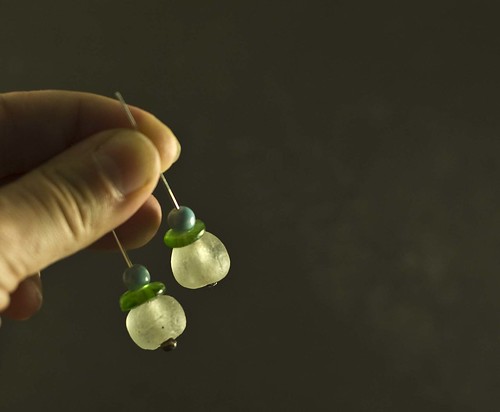
Arrange your beads on the posts. I put the little wood seed beads on the bottom because the holes in the recycled beads were too big.
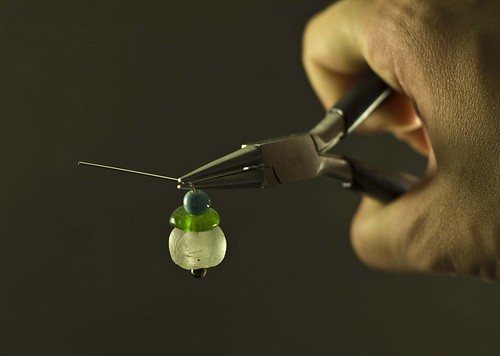
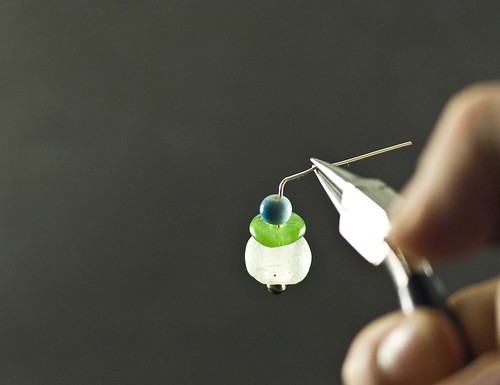
Give the post a bend about an eighth of an inch from the top bead.
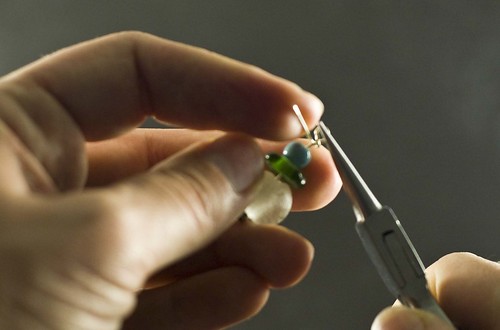
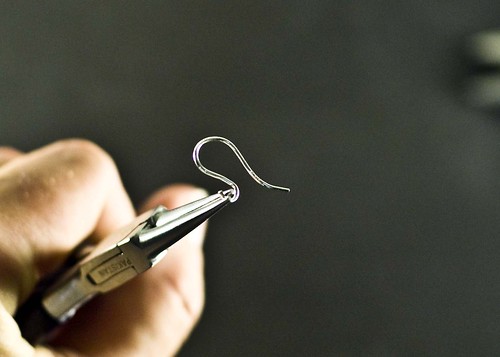
Grip the post about a half inch from the bend and roll it toward the top bead so you get a loop:

This is what the loop will look like.
Grip the loop with your pliers (the round or flat nose will both work fine). Using your index finger of your left hand, wrap the end of the wire around the post below the loop. Make about 3 rounds like that. This is where the flat nose pliers come in handy. If you do not have perfect little wraps (takes a lot of practice), you can wrangle them into place by applying pressure with the flat nose plier.
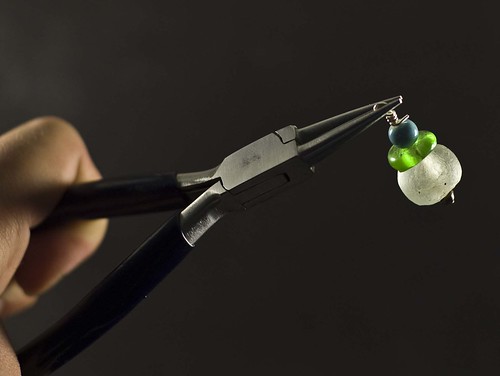
It should look like this.
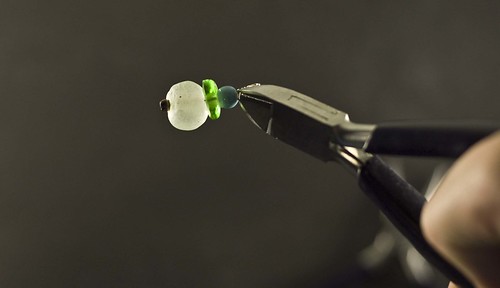
Really wedge the wire cutters in there as close as possible to the wrapped wire and trim the end. Use the round nose plier to try to push it as flush as possible to the post and into the top of the top bead.
Open up your earring hoop with the around nose pliers by rolling it open.
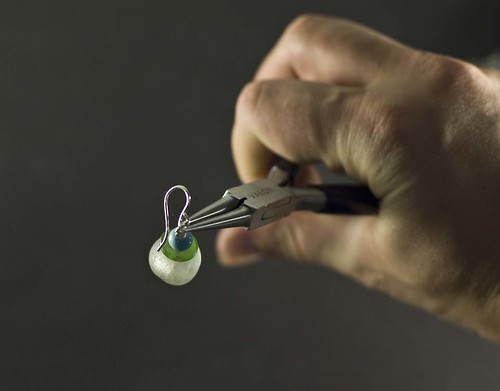
Put the loop over the open hoop. Then roll it shut again with the round nose pliers.

And that’s it. Once you get a few done, you can start whipping up earrings in about 10 minutes a pair or less. They make great Christmas gifts, birthday presents and “you’re swell and I’m glad your my buddy” gifts. :)
How do you like to use up your leftover beads?
Happy crafting!
Kristin


Those earrings are pretty :) You should definitely link up at FaveCrafts! We're hosting our first blog hop today, and I'd love to see your link there.
https://www.favecraftsblog.com/finished-on-the-fifteenth-favecrafts-blog-hop-for-october/
Thanks so much for the tutorial. I've always wanted to make beaded earrings like these; now I can try. :)
LOVE THEM! I too moved (a YEAR ago) and all but a few pieces of my jewelry are packed in my garage in who knows what box. It's making me crazy, I don't feel complete without my jewelry. I am having a yard sale next month and will be on a mission to find my jewelry. All the Best to You, Katy
Ooh pretty! And so giftable- yay! Thanks so much for this, I'll be linking.
I'm new to jewelry making – actually have lots of stuff purchased, nothing made yet. What is a recycled bead? <3 Terri
ah recycled glass beads. they are made from glass that's been melted down. These particular ones were from a friend who was living in africa at the time. she bought them from a co op where they melted down all sorts of glass and made them in the sand (I think, Amy, correct me if I'm wrong and you see this).
Excellent tutorial! It should encourage any one new to making earrings to give it a go!
great crafting)))